環境:swift5
コードのみで実装とStoryboard/xibを利用した場合の2種類のコードを掲載しています
UIButtonの基礎
buttonでよく利用されていると思われるもの
- setTitle
- タイトルテキストを設定
- setTitleColor
- タイトルテキストの色を設定
- addTarget
- ボタンを押したときのアクションを設定
- setImage
- ボタンに画像を設定
コードのみで実装
縦100x横100で作ってviewの中央に配置
button.center = self.view.centerで画面中央に移動させています
import UIKit

class ViewController: UIViewController {

    var button:UIButton!

    override func viewDidLoad() {
        super.viewDidLoad()

        button = UIButton()
        button.frame = CGRect(x: 0, y: 0, width: 100, height: 100)
        button.center = self.view.center
        button.setTitle( "Button", for: .normal)
        button.setTitleColor( .black, for: .normal)
        button.addTarget(self, action: #selector(buttonTap(_:)), for: .touchUpInside)
        self.view.addSubview(button)
    }

    @objc func buttonTap(_ button:UIButton) {
        print("ボタンがタップされました")
    }
}
Storyboard・xibを利用
Buttonの配置、色はStoryboard側で設定するためボタン配置等のコードは不要です
ボタンとアクションにStoryboardから接続してください
import UIKit
class ViewController: UIViewController {
@IBOutlet weak var button: UIButton!
override func viewDidLoad() {
super.viewDidLoad()
}
@IBAction func buttonTap(_ button:UIButton) {
print("ボタンがタップされました")
}
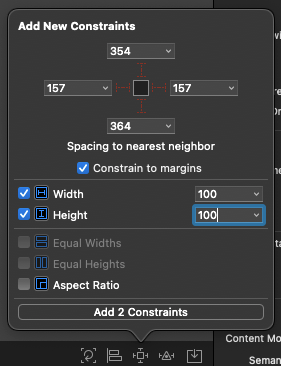
}100×100のボタンを中央に配置する場合は下記の画像を参考にしてください
ボタンのサイズを100×100に設定する
ボタンの配置をセンターに設定
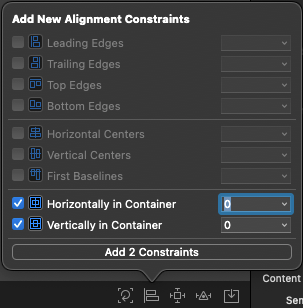
以上で100×100のボタンがViewのセンターに表示されるようになります